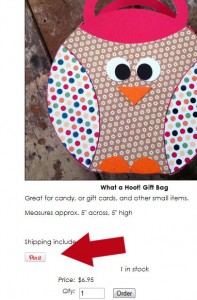
Those that use Pinterest regularly are familiar with the “Pin It” browser add-on that lets you automatically pin just about anything you find while searching the web to a board on your Pinterest account. This is the best way to pin from a website and most Pinterest users will use this method but for those that would like to have a pin it button on their website pages or for their products here is a tutorial on how to do this.
This tutorial is slightly advanced. It will require you to edit your website template code.
First bring up your website in a browser window.. then in another window bring up the Pinterest website.
Creating the Pin It button
Step 1: Login to your Pinterest account
Step 2: Hold your mouse over About in the right hand corner of the Pinterest page and click the Pin It Button link in the drop down menu.
Step 3: Scroll down the page till you see “Pin It button for websites”.
Step 4: View your site and go to the page you are creating this pin it button for. Copy the URL in the browser address bar.
Step 5: View the Pinterest page again and paste the url you just copied into the “URL of the page the pin is on” space.
Step 6: Go back to your website, right click on the image you want to show when a user pins this page or item and choose “copy image url”
Step 7: View Pinterest again and paste this url into the “URL of the image to be pinned” space.
Step 8: Enter a description if you like (optional)
Step 9: Choose how you want the Pin Count to appear.
Step 10: Copy the code Pinterest creates for you in the first box.
Step 11: Login to your storeadmin and edit the page or product you set the button up for, click in the content area and click the <> symbol or html to view the code and paste your Pinterest code. Click <> or html to switch back.
Step 12: Save your changes.
The steps below will only need to be done ONCE. You DO NOT need to do this for each Pin it button you add to your site. Pasting this code in your template will work for every button you add after.
Step 13: Go back to Pinterest and copy the code in the second box that requires you to “Paste above the </body> tag” in your website
Step 14: If you do not already know what template number you are using go to Template in your storeadmin and check. Once you know then you will need to login to the CPANEL for your website.
Step 15: In cpanel go to File Manager and then into public_html and into the Template folder. Edit the number template you are using.
Step 16: Scroll down through the code very close to the bottom and look for </body> Paste your Pinterest code just above that. Save.
At this time if all steps were completed correctly your new pin it button will be working on your website.
If you are using a custom template and the code is available in your storeadmin in the custom template area then you can add this second code before </body> there and you can skip logging into cpanel. Be VERY careful modifying custom template code. If you are not sure of what you are doing it may be a good idea to contact your template designer and ask them to add the code for you.


